

There’s a timeless allure to chess that draws millions into its intricate battlefield. As I guide you through this complex game, I will help you understand the important rules, master the unique moves of each piece, and introduce you to effective strategies that can turn the tide of the game. Whether you’re aiming to sharpen your skills or start your journey confidently, your grasp of these fundamentals will empower you to outthink your opponent and enjoy every challenge on the board.

The Chessboard and Fundamentals of Play
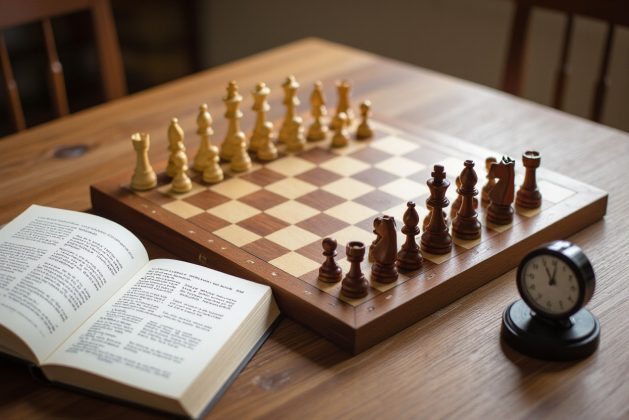
The chessboard, an 8×8 grid of alternating light and dark squares, forms the battlefield where your strategy unfolds. Each player commands 16 pieces, each with unique movements, starting positioned strategically to maximize their potential. Mastering the board’s layout and how pieces interact on it creates a foundation for tactical play and deeper understanding of chess’s layered complexities.
Setting Up the Board: Positioning Pieces for Success
Place the board so that a white square rests on each player’s right side—this simple setup ensures consistency. The second row (or rank) fills with pawns, creating your front line. Back rank arrangement starts from the corners with rooks, then knights beside them, bishops next, the queen on her matching color (white queen on white), and the king in the remaining center square, ready to defend or advance your position.
Understanding Chess Notation: Reading and Recording Moves
Chess notation translates moves into a concise language using letters and numbers—files labeled ‘a’ through ‘h’ and ranks numbered 1 to 8. Moves like Nf3 indicate a knight moving to the square f3. This system not only documents games for analysis but allows you to replay historic matches and learn from grandmaster strategies, bridging your experience with a global chess community.
Diving deeper into notation, the use of symbols enriches understanding: ‘x’ denotes captures, ‘+’ marks check, and ‘#’ signals checkmate. Castling appears as ‘O-O’ for kingside or ‘O-O-O’ for queenside. Annotating games sharpens your tactical recognition by letting you revisit pivotal moments with clarity, making notation an invaluable tool in progressing beyond basic play and into meaningful study.

Maneuvering Your Pieces: Mastering Moves and Tactics
Understanding how each piece moves and how to employ basic tactics dramatically enhances your ability to control the game. Precise piece coordination and anticipating your opponent’s threats give you leverage to dominate the board. Effective maneuvering isn’t just about moving forward—it includes positioning pieces for defense, creating threats, and exploiting weaknesses. The difference between a novice and a seasoned player often lies in how well they use these concepts to execute meaningful, forward-thinking moves that set traps or force exchanges in their favor.
The Unique Moves of Each Piece: A Guide to Movement
The king moves one square in any direction, making it vital to keep safe. The queen wields incredible power, moving any number of squares vertically, horizontally, or diagonally. Rooks dominate the ranks and files, bishops control diagonals, while knights perform those distinctive “L”-shaped jumps that bypass obstacles. Pawns advance forward one square but capture diagonally, with the option to move two squares on their first move and promote when reaching the opposite side. Mastery comes from not just knowing these moves but using them together strategically.
Basic Tactical Concepts: Pins, Forks, and Skewers
Some of the most effective tactics involve pressure points such as pins, forks, and skewers. A pin happens when a piece cannot move without exposing a more valuable piece behind it. A fork allows a single piece, often a knight or pawn, to attack two or more opponent pieces simultaneously. A skewer is like a reverse pin, where a more valuable piece is attacked first, exposing a less valuable piece behind it. These tactics force your opponent into difficult decisions, often winning material or positional advantage.
Delving deeper, pins restrict whole lines of movement, frequently immobilizing an opponent’s defensive core. For example, a bishop pinning a knight against the queen stops the knight from moving without losing the queen. Forks leverage threats across different parts of the board—like a knight attacking both a rook and a queen—compelling your opponent to sacrifice something valuable. Skewers, on the other hand, create tension along a line, forcing the higher-value piece to move and expose another piece behind it, often setting up captures that shift momentum in your favor. Mastering these tactics turns your pieces into constant threats your opponent must carefully navigate around.
The Art of Defense: Protecting Your King and Kingdom
Defense in chess often dictates your game’s longevity, as safeguarding your king directly influences your chances of winning. You must balance fortifying your position with seizing opportunities, anticipating opponent threats while maintaining flexibility. Prioritizing your king’s safety through strategic pawn structures and piece placement transforms your setup into a fortress that frustrates attacks and invites counterplay. Strong defense doesn’t mean passivity; it’s a dynamic interplay that can shift momentum in your favor.
Key Defensive Strategies: Creating a Solid Fortress
Building a solid fortress involves controlling critical squares near your king, typically with pawns supporting knights and bishops. For instance, the classic castling move not only tucks your king away but also connects your rooks for future defense. Positioning pawns on e3 and d4 in openings like the Ruy López restricts enemy infiltration. Avoiding weaknesses, such as isolated or doubled pawns, helps maintain a resilient structure that resists tactical blows while preparing for your counterattacks.
Recognizing Threats: Identifying and Responding to Opponent Moves
Spotting your opponent’s intentions requires constant scanning of potential attacks on your pieces, especially the king. Tools like evaluating pin threats, forks, and discovered attacks sharpen this skill. For example, noticing your opponent’s knight eyeing a vulnerable pawn signals the need for protective repositioning. Keeping track of opponent piece alignments helps you anticipate tactical combinations and respond proactively, whether by retreating, blocking, or counterattacking.
Developing a keen eye for threats means learning to mentally map which of your pieces can be targeted next and calculating consequences several moves ahead. If your opponent’s bishop positions itself on a long diagonal, controlling squares near your king, that demands immediate attention. I often use the technique of asking myself, “If I move here, can my opponent capture, fork, or pin?” This mental checklist guides my defensive decisions, enabling me to absorb pressure without losing material or positional advantage while subtly shifting the balance toward eventual offense.
Opening Moves That Shape the Game: Strategies for Success
Opening moves dictate the game’s flow and can create immediate pressure or solid defense. I focus on quick development and flexible positioning, ensuring my knights and bishops gain influence early while safeguarding the king with timely castling. Your opening choices set the tone, so mastering a few well-studied openings provides a tactical edge and helps you adapt to various opponents’ responses effectively.
Popular Opening Strategies: The Scholar’s Mate & The Italian Game
The Scholar’s Mate aims for a swift checkmate in just four moves, targeting the opponent’s vulnerable f7 or f2 square with a queen and bishop. While effective against beginners, it’s easily thwarted by experienced players. On the other hand, The Italian Game focuses on rapid development and control of the center using moves like e4, Nf3, and Bc4, offering a balance of offense and defense and leading to rich middlegame possibilities.
The Importance of Control: Dominating the Central Squares
Central squares (e4, d4, e5, d5) serve as the battlefield’s heart, granting pieces maximum mobility and influence. I prioritize placing pawns and knights here early, enabling quick attacks and smooth defense transitions. Controlling the center restricts your opponent’s options and creates pathways for your bishops and queen to apply pressure across the board.
Expanding on this, I often deploy pawns to e4 and d4 as White or challenge these squares as Black with …e5 or …d5, securing space and opening lines for my minor pieces. Knights launched into c3 and f3 (or c6 and f6 for Black) support these central pawns while threatening enemy central squares. Dominance in the center forces opponents into passive moves or awkward piece placements. Even grandmasters emphasize central control; it’s foundational for effective openings and smooth piece coordination throughout the game.

Mid-Game Strategies: Turning the Tide in Your Favor
Once the opening moves have set the stage, the mid-game demands a sharper focus on positioning and momentum. You need to spot opportunities to outmaneuver your opponent by targeting weak squares, launching tactical attacks, or fortifying your defenses. Every move should build toward increasing control over the center and creating threats that stretch your opponent’s resources. Recognizing potential forks, pins, or discovered attacks can swing the game in your favor. I find the mid-game best approached with a blend of calculation and intuition, balancing risks and rewards by continuously evaluating your piece activity.
Managing Resources: Effective Use of Pieces and Pawns
Each piece and pawn carries unique strengths and limitations, so optimizing their coordination can amplify your board control. I often prioritize mobilizing knights and bishops early in the mid-game while safeguarding pawns that can serve as strongholds or triggers for pawn breaks. You want to avoid unnecessary exchanges unless they lead to a clear advantage. Using pawns to open lines for rooks or bishops and using your queen judiciously to avoid early exposure creates a dynamic yet solid stance. Your ability to juggle defense and offense through resource management dictates much of the mid-game’s outcome.
Strategic Goals: Building an Advantage and Preparing for Endgame
Transitioning toward the endgame means I focus on simplifying the board advantageously and solidifying material or positional gains. Your strategic ambitions include creating passed pawns, dominating open files with rooks, and ensuring your king is well-positioned to support these advances. Pressuring weaknesses like isolated or backward pawns often sets the stage to win material. Simultaneously, keeping your pieces coordinated for flexibility helps you adapt quickly as the endgame unfolds, maximizing every advantage created during the mid-game.
Diving deeper, advancing strategic goals involves calculating the long-term potential of pawn structures and piece placement. Crafting a passed pawn might require several preparatory moves, like exchanging certain pawns or steering your king toward the center. Dominating open files allows rooks to infiltrate enemy territory, often forcing concessions or exchanges that simplify your advantage. Examples from classical games show how a well-timed rook lift or knight outpost can transform positional pressure into tangible winning chances. I actively anticipate the endgame by evaluating these dynamics, making moves that align immediate threats with lasting benefits.
Final Words
With this in mind, I encourage you to practice regularly and be patient with your progress as you learn how to play chess. Understanding the rules, mastering the moves, and exploring various strategies will gradually enhance your skills. I believe that with dedication and curiosity, you can enjoy the depth and challenge this timeless game offers. Your journey into chess is just beginning, and by applying what you’ve learned here, you’ll find both enjoyment and growth in every game you play.


Leave a comment